How to add a scroll-to-top button to your website
How to add a scroll-to-top button in Framer to improve navigation on your website.
Navigation bar with relative, absolute, or sticky positioning
Add your button:
Place your icon in the desired position. In this demo, the button is fixed at the bottom, pinned to the bottom right.
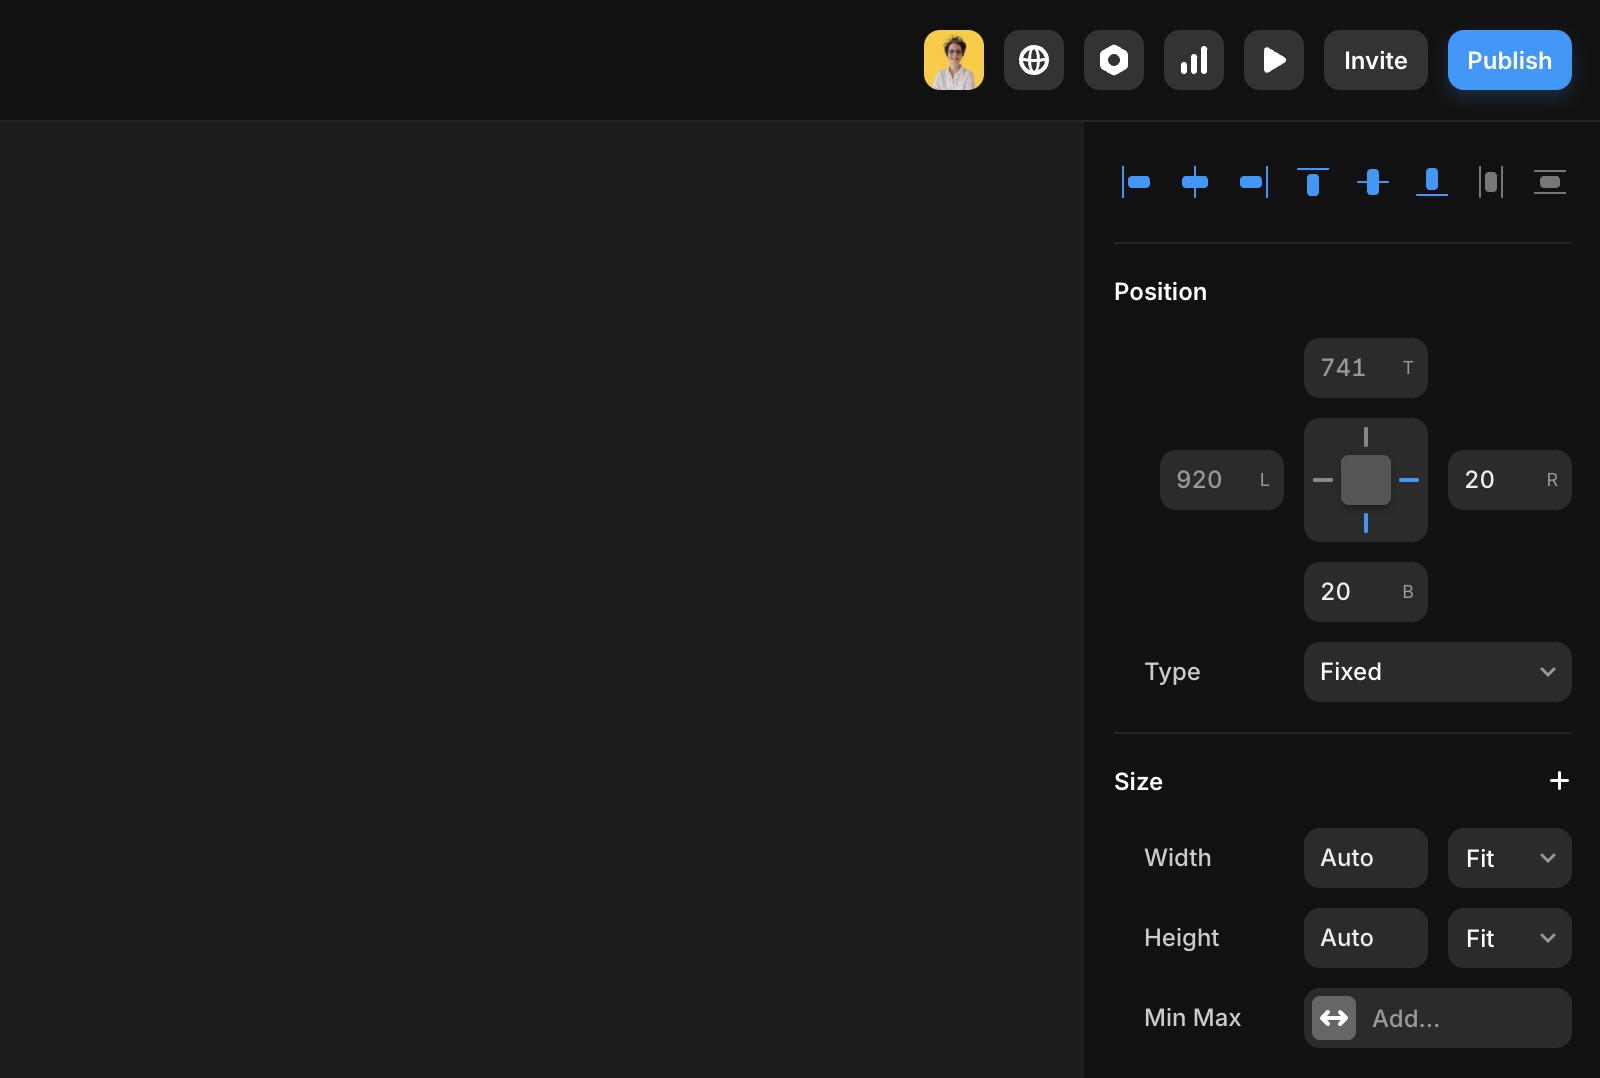
2. Create a scroll section:
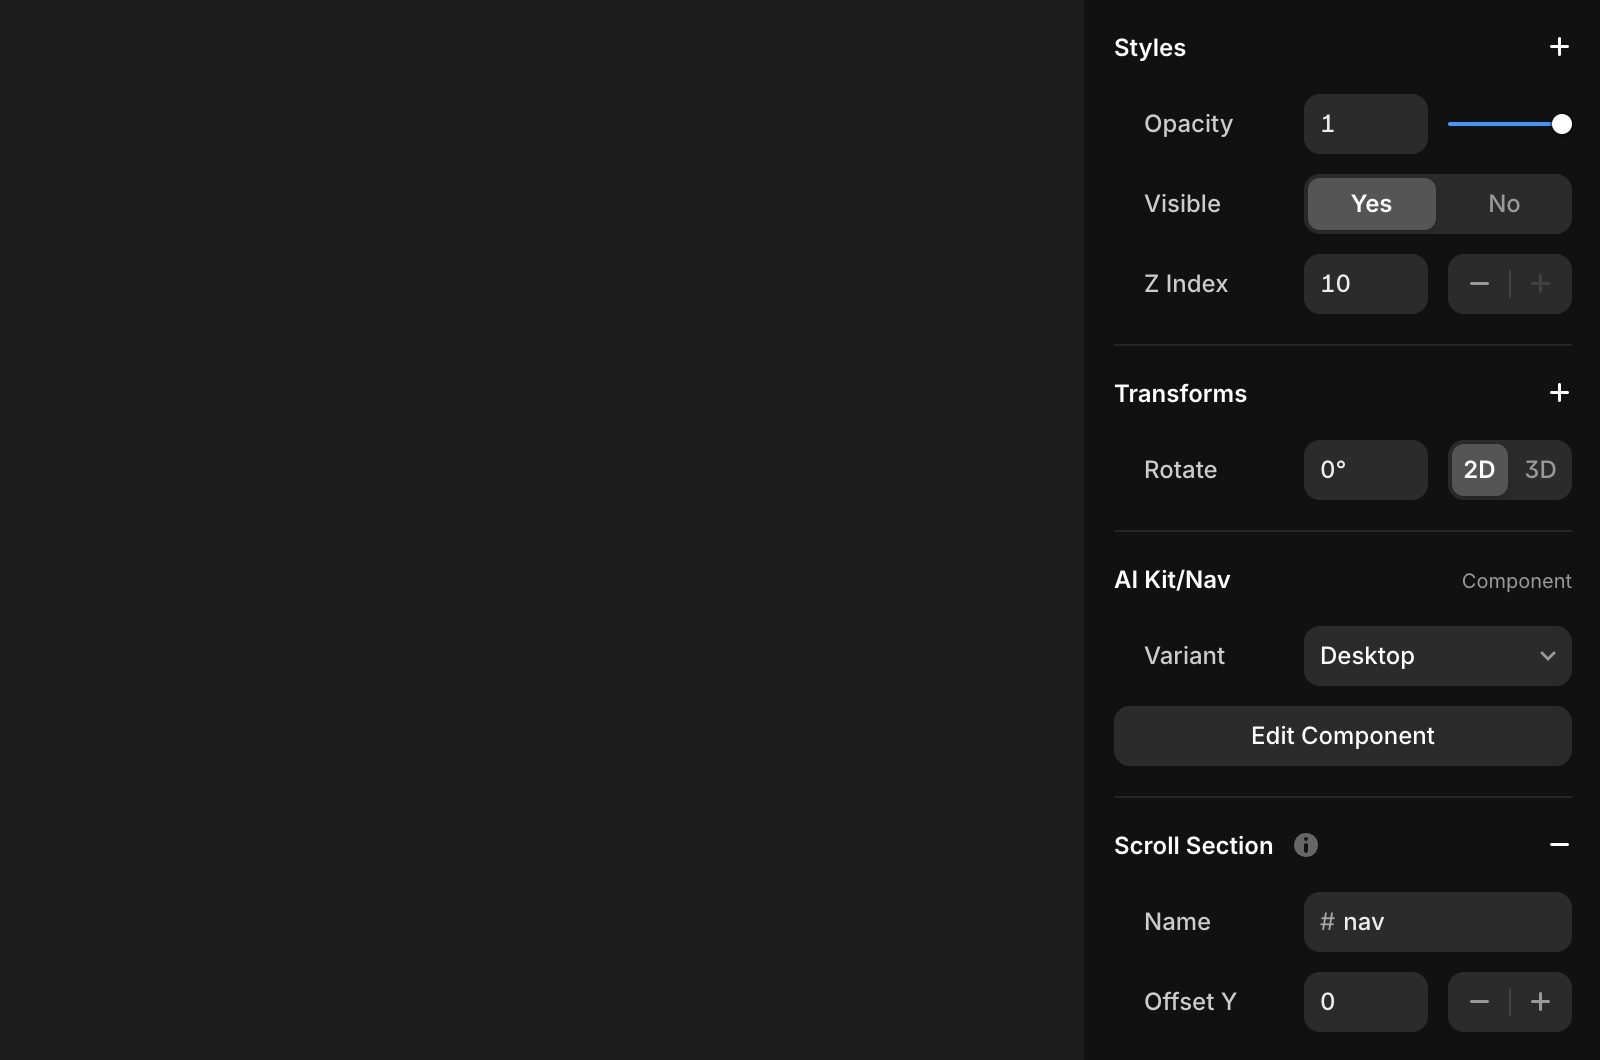
Select your navigation bar.
In the right panel, click the + icon next to Scroll Section and name the section.
Link the button:
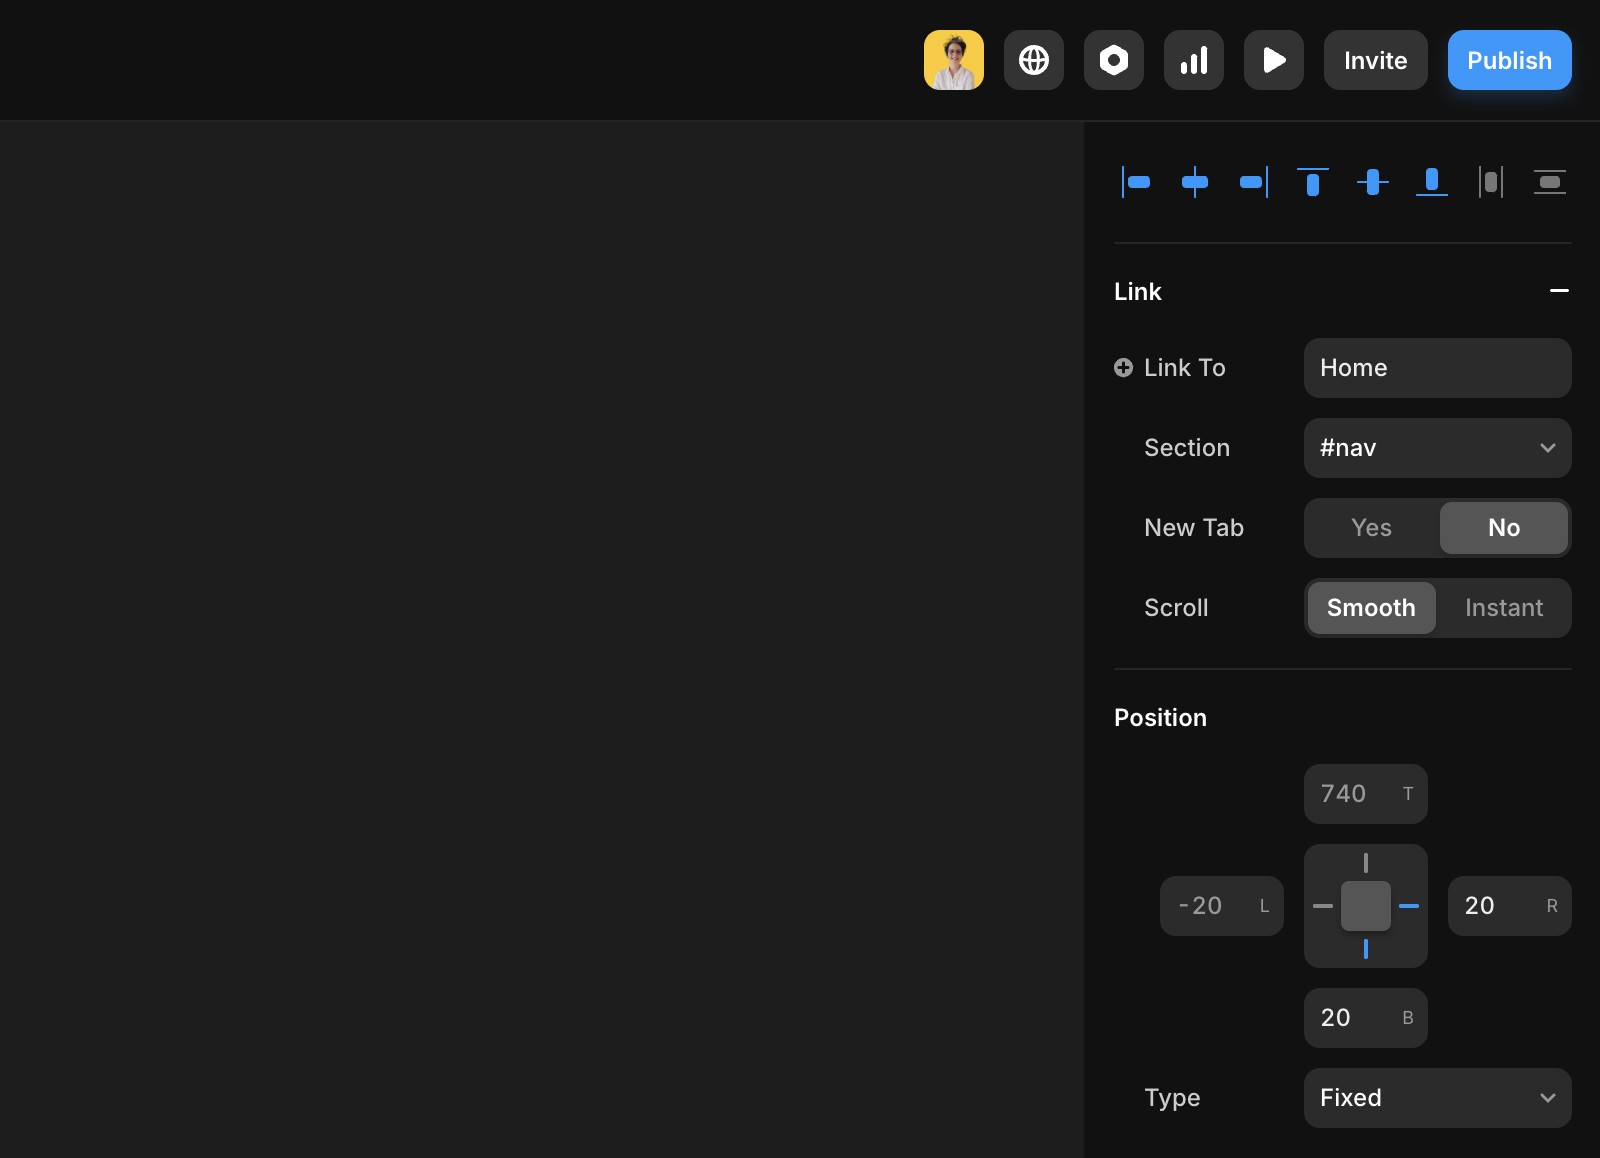
Select the scroll-to-top button.
Click the + next to Link in the right panel.
Choose the page and section you named in the previous step.
Additional resources
For a hands-on example, you can remix this project.
If you're still experiencing issues, please reach out to us through our contact page for further help.