Intro to Workspace Plugins
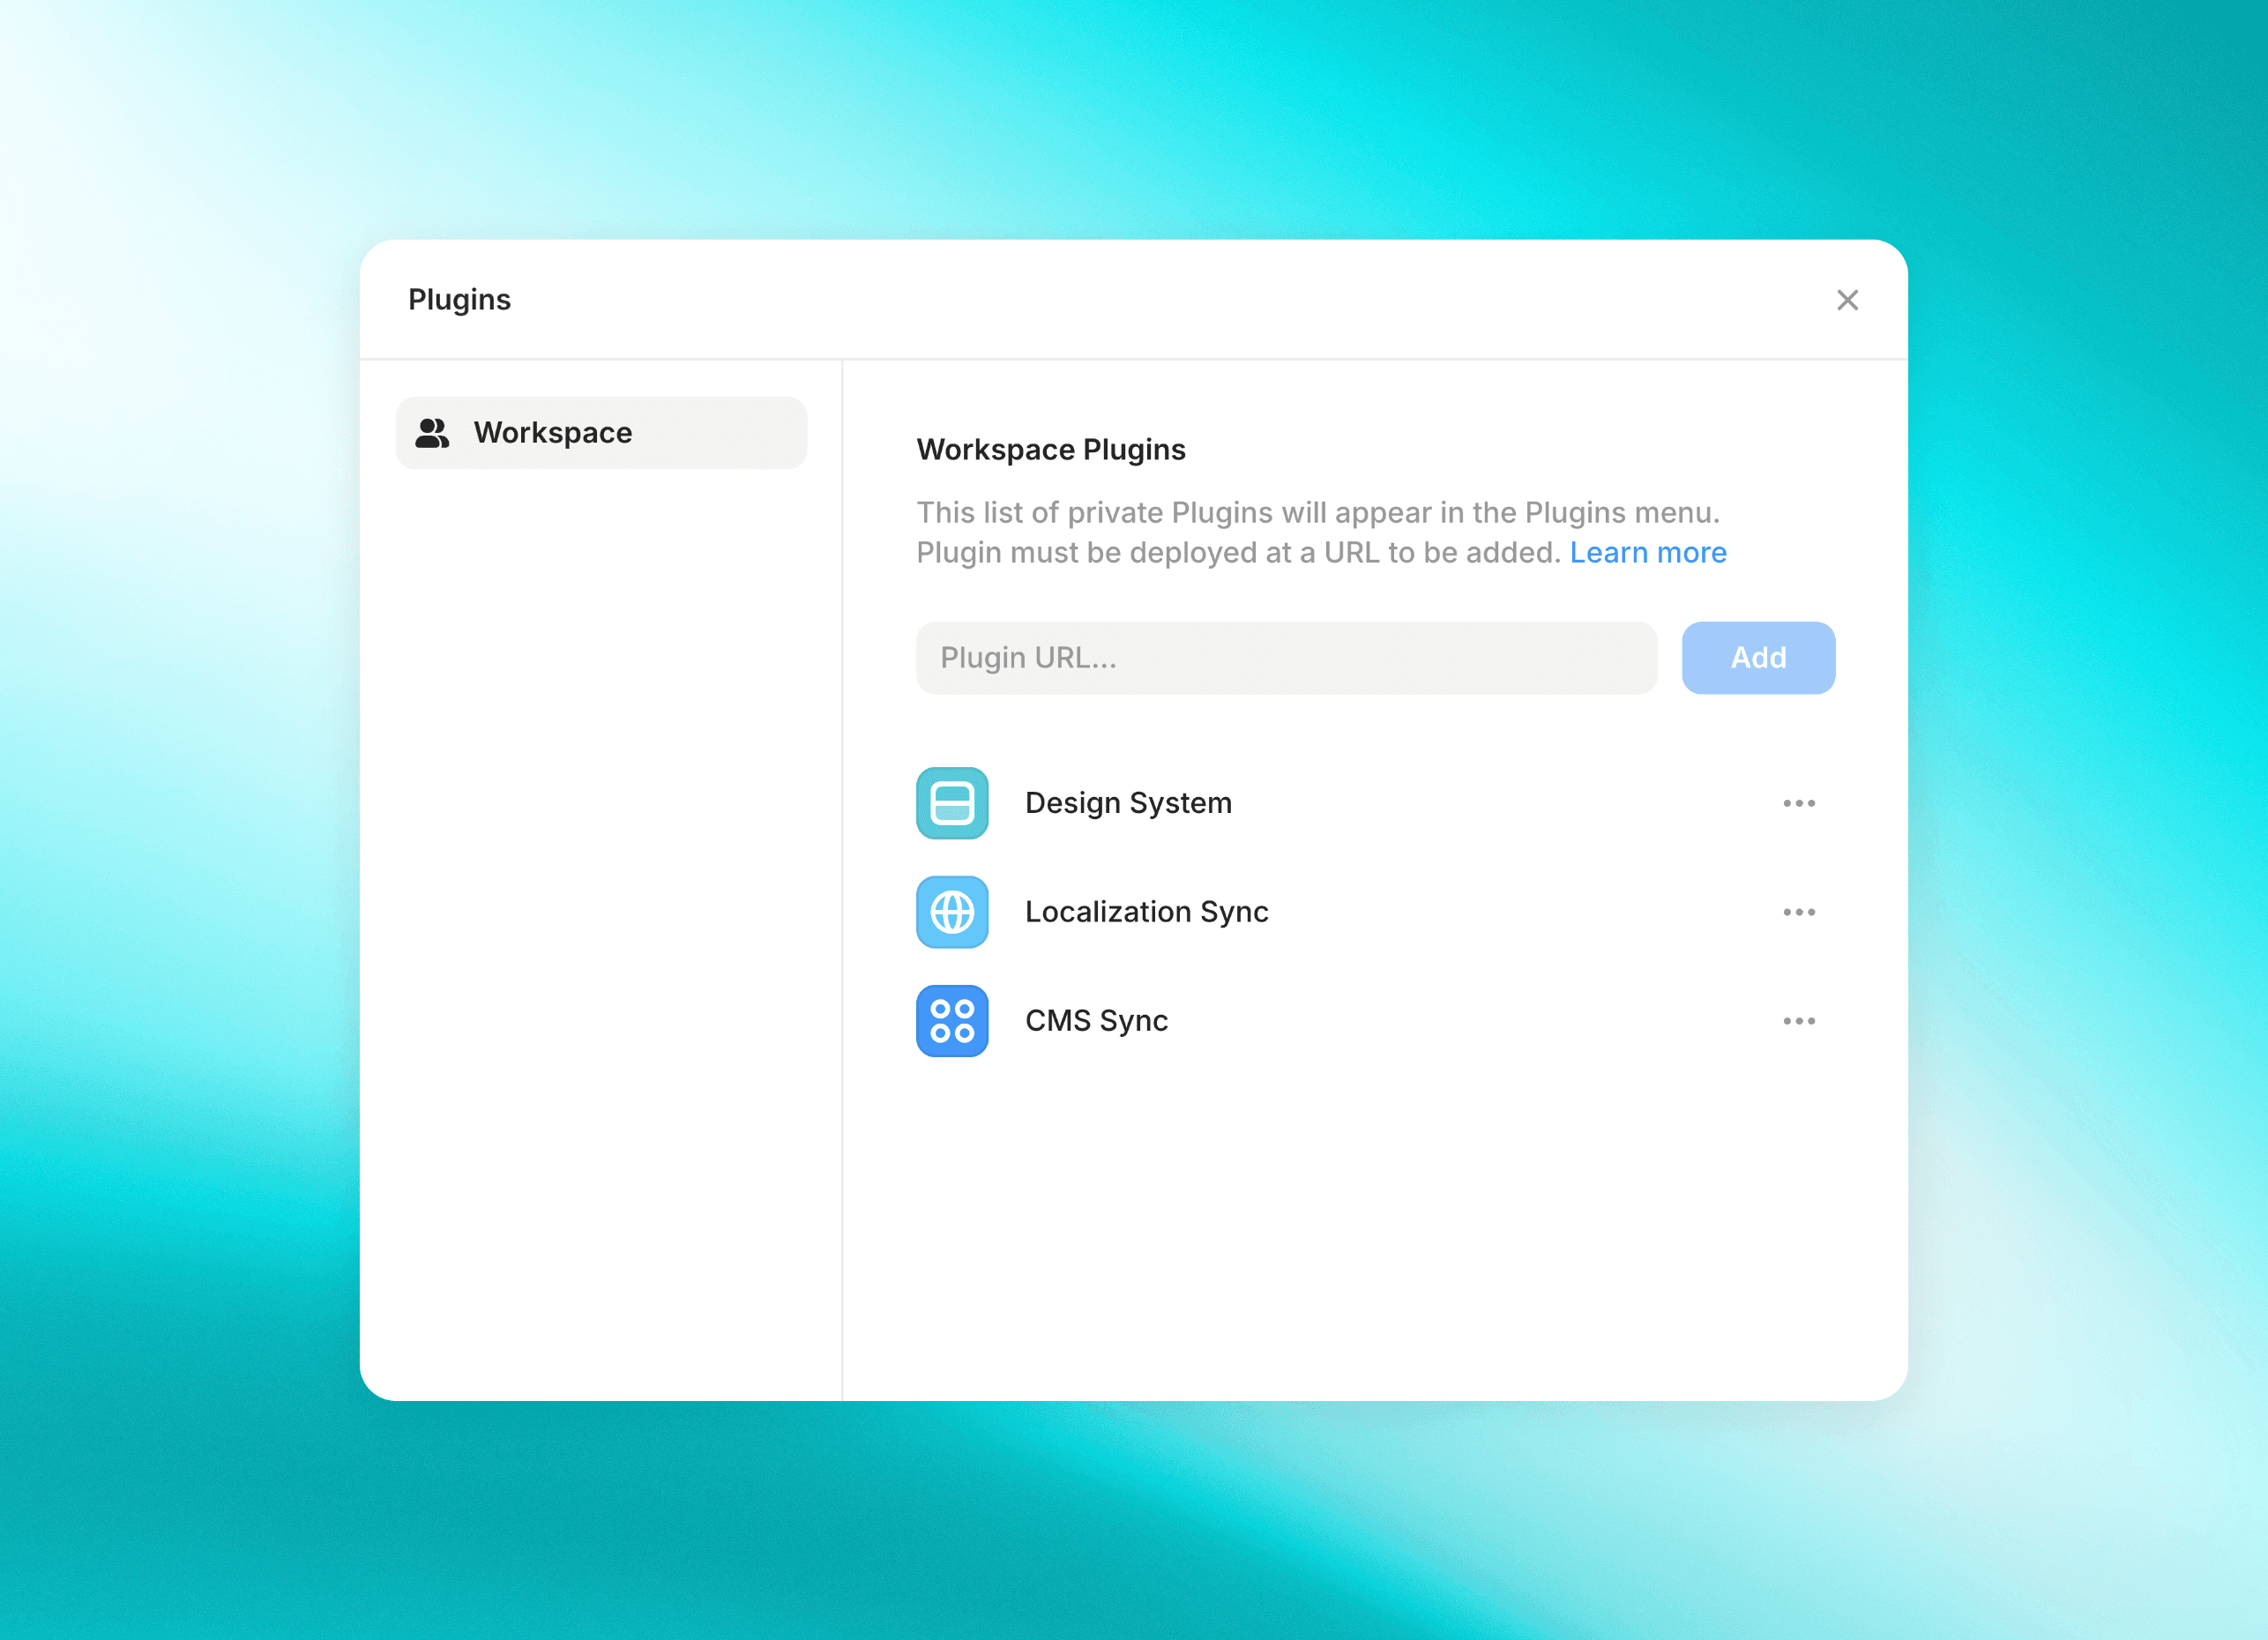
Plugins are small apps that can be deployed on the web, just like a website. With Workspace Plugins you can deploy a Plugin once, add it via the Plugins modal on the dashboard, and instantly have it appear in the Plugin menu in every project in the Workspace. Once you have access to the feature, you will see a “Plugins” entry-point in the dashboard where you can go to manage the Plugins for your Workspace.
Enterprise Add-on
This feature is an add-on available for Enterprise teams at an additional cost. Contact your account manager for access or learn about Framer Enterprise.
Adding Plugins
From within the Plugins modal, you can add your Plugin URL. Workspace Plugins are self hosted, to give you full control to incorporate the Plugin into your internal systems and push updates instantly. When adding the URL, Framer will validate that it is set up correctly, and pull the name and icon info from your Plugin’s framer.json file.
Configuring your Plugin
To customise the Name and Icon of your Plugin, you'll want to customise the framer.json file. You can learn more about this on the configuration page.
Updating your Plugin
Framer renders your Plugin URL directly in a secure iframe, so it will always point to the latest version each time the Plugin is opened. When updating the Modes, Icon, or Name of the Plugin, you will want to sync the updates into Framer by finding the Plugin in the Plugins modal on the dashboard, opening the context menu for that Plugin, and selecting ”Sync Info”.
Deploying a Plugin to a URL
Plugins are static assets and any Plugin created with npm create framer-plugin is setup for easy deployment. You can choose any static hosting you prefer, or can find instructions for using Vercel and Cloudflare below.
Note
You will want to make sure the
framer.jsonfile is statically hosted at the root of your Plugin deployment. This will happen automatically if you use our default Plugin.
Conflicting Plugin IDs
Framer uses the id field in your framer.json to differentiate each Plugin from one another, for example knowing which CMS Collection was synced by which Plugin. You’ll almost always want to ensure this value is unique, and Framer will warn when adding a Workspace Plugin with an ID that already exists in your Workspace. If you encounter this error, ensure you are uploading the correct Plugin and change the id if needed.
Deploying with Vercel
Read the getting started guide or follow these steps:
In the root of your Plugin directory run
npx vercelFollow the steps required to deploy to Vercel
Important: Log into your Vercel account and disable Vercel Authentication under Deployment Protection so that your deployment is publicly accessible
Now your plugin should be shareable in the URL displayed by Vercel.
Deploying with Cloudflare
Follow the steps in the getting started guide to setup your project
During configuration set
npm run buildfor the build commandDuring configuration set
./distfor the build output directoryConfirm the deployment
Now your plugin should be shareable in the URL displayed by Cloudflare.